Friday, December 31, 2010

My Aunt's Watermelon Painting

My aunt is a very talented crafter. Through her influence, I learned to hand quilt, finished a couple of latch-hook rugs, made several pairs of Indian bead earrings, etc. I get some of my craftiness from her, I think.

Three years ago, while visiting my aunt, she gave myself and each of my siblings a painting she had done. I was the lucky one to get her watermelon painting. I've been storing it for the last 3 years so my kids wouldn't ruin it. During Thanksgiving, one of Micheal's Black Friday deals was custom framing for almost 70% off. I took my aunt's painting and had it framed. I finally got to pick it up today and hung it up as soon as I got home. Doesn't it look wonderful?


I love this painting and I love my aunt. Now I get to see it and think of her every time I go into my dining room.

Monday, December 27, 2010

The Beadboard is DONE!

A few days ago, I realized that my husband's sister and her husband were coming to visit and would need a bathroom to use. Our boys have been using ours for the past month (it's getting really old though...), but I didn't want guests to have to come through our bedroom just to brush their teeth or whatever. So, it was time to stop procrastinating and finish something already!

I added the chair rail just before Christmas. Today, my hubby took our boys to the park while I caulked everything. We painted it this afternoon and again this evening. Here's what it looks like so far:

I saw on a blog recently a tip to tape off where you want to caulk above chair rails so you get a nice crisp line. I did it and it worked beautifully! The first coat of white we put on this afternoon was Eggshell Cream (Behr paint from HD) that I colored matched months ago to Rustoleum's Heirloom white since I want to paint some furniture (all our nursery stuff) that color. It didn't quite match the Swiss coffee trim color throughout our house, so while that coat dried, we ran to HD and got a gallon of the right shade of white and added that after the kids went to bed. We'll put the back of the toilet on tomorrow before my SIL arrives and I'll start decorating. We haven't added the crown molding yet. We borrowed a miter saw, but it doesn't have a high enough fence (it's the flat metal part you push what your cutting against) to easily cut crown molding, so I'm trying to talk my hubby into letting me get this miter saw in the near future. Talk of crown molding throughout our house is helping him feel like it's a worthwhile purchase... Either way, we'll be adding the crown molding after the New Year. Here's a good tip for painting beadboard that we discovered while doing it. Use 2 inch foam brushes. They are just the right width for the flat parts of the beadboard and the sharp, triangle end is perfect for running down the grooves of the "bead" part. We ended up painting everything using those brushes and it really went fast and looks great.

I'll post more "finished" pictures after I get the shower curtain and a few other things up. I'm getting so excited!

Sunday, December 26, 2010

My Son's Lego Table

Several years ago, I had a friend give me this little end table. I'd always planned on stripping it and re-staining it. Several months ago though, I decided it would make the perfect lego table for my 4 and 5 year olds. In June, I picked up the lego base plates ($5 each) and I finally started working on it a month ago. I got it sanded a primed and let it sit in my garage for almost a month. Two days before Christmas I decided I needed to get it finished since it was supposed to be my 5 year-olds "big" gift this year. I'm glad to say, I got it done!

Here it is before:

And here is the after:

I picked up the knobs at Home Depot months ago. I primed with gray primer and then added 2 coats of red on top (I sort of ran out of time for painting...). I like the gray primer showing just a smidge through the red. I used epoxy glue to attach the base plates and my husband's college textbooks to "clamp" the plates down while the glue set. I also mod podged some cute scrapbook paper to the inside of the drawer. I used the hard coat stuff and it said to do 5 layers. I think I only did 4. It has a nice hard coating now. It looks even better in person (I think).

Here it is Christmas morning being used by all my boys. I think it's a hit!

This experience has shown me that you can refinish a piece of furniture in a very short amount of time. Next time though, I want to give myself a little more time...

I used a lot of things I already had on hand, so including the base plates and other materials I had to buy for this project, I think the cost of this table came to about $30. Not bad for something my kids will use for years.

Wednesday, December 22, 2010

Superhero Capes

Thanks to my good friend, Morgan, I was able to check something off my to-do list yesterday. My boys' superhero capes. My husband and I designed the appliques with the boys' initials and Morgan and I cut them out on my vinyl cutter a week or so ago. Yesterday, Morgan came over and we got started. We made ourselves a cape pattern, ironed the appliques down and then satin stitched around the edges. We added double-folded bais tape for the edge and sewed velcro to the extra "collar" part of the bais tape. They were pretty easy to do. Morgan made one for her son, too. Of course, since she's a sewer, her's looks much better than my 3. The important thing is that they love them.

In the picture above, my youngest ran off to show Dad, who'd just gotten home.

I had my boys put them on for pictures then told them that the capes were mine until Christmas. They're pretty excited for Christmas morning. I have a feeling these capes will go on in the morning and they'll do everything in them all day. It's nice to actually finish something. Thanks again, Morgan!

Monday, December 13, 2010

One "finished" project!

So, tonight, I patched the holes from our first attempt at installing our lovely new gate and we (mostly my hubby) installed the gate at the stud. I wanted to install the gate at the edge of the carpet, but that was too close to the corner with no stud. The wall mounting thingies kept punching through the drywall instead of grabbing onto it, so we had to move it 3 inches to the stud so the kids can't rip the gate out of the wall when they try to get into our computer room.

Here's my hubby installing the last piece and then tightening the bolts after we got the gate up. Isn't it cute? I mean, for a gate, anyway...

Please ignore the mess of our office/library. It's the first room that will be tackled once I'm finished with my projects upstairs. It's still months away, but I've got some great plans in store. Until then, this room is just an embarrassing, unorganized mess.

I still need to sand the spots I repaired and probably spackle again and sand again and then paint over them. I have a spot upstairs that needs to be painted too (same color), so I'm hoping that with 2 things, I'll actually get both of them done. Hopefully, I'll finish that up tomorrow and then we can finish up the bathroom. We'll see.

Current Projects Update

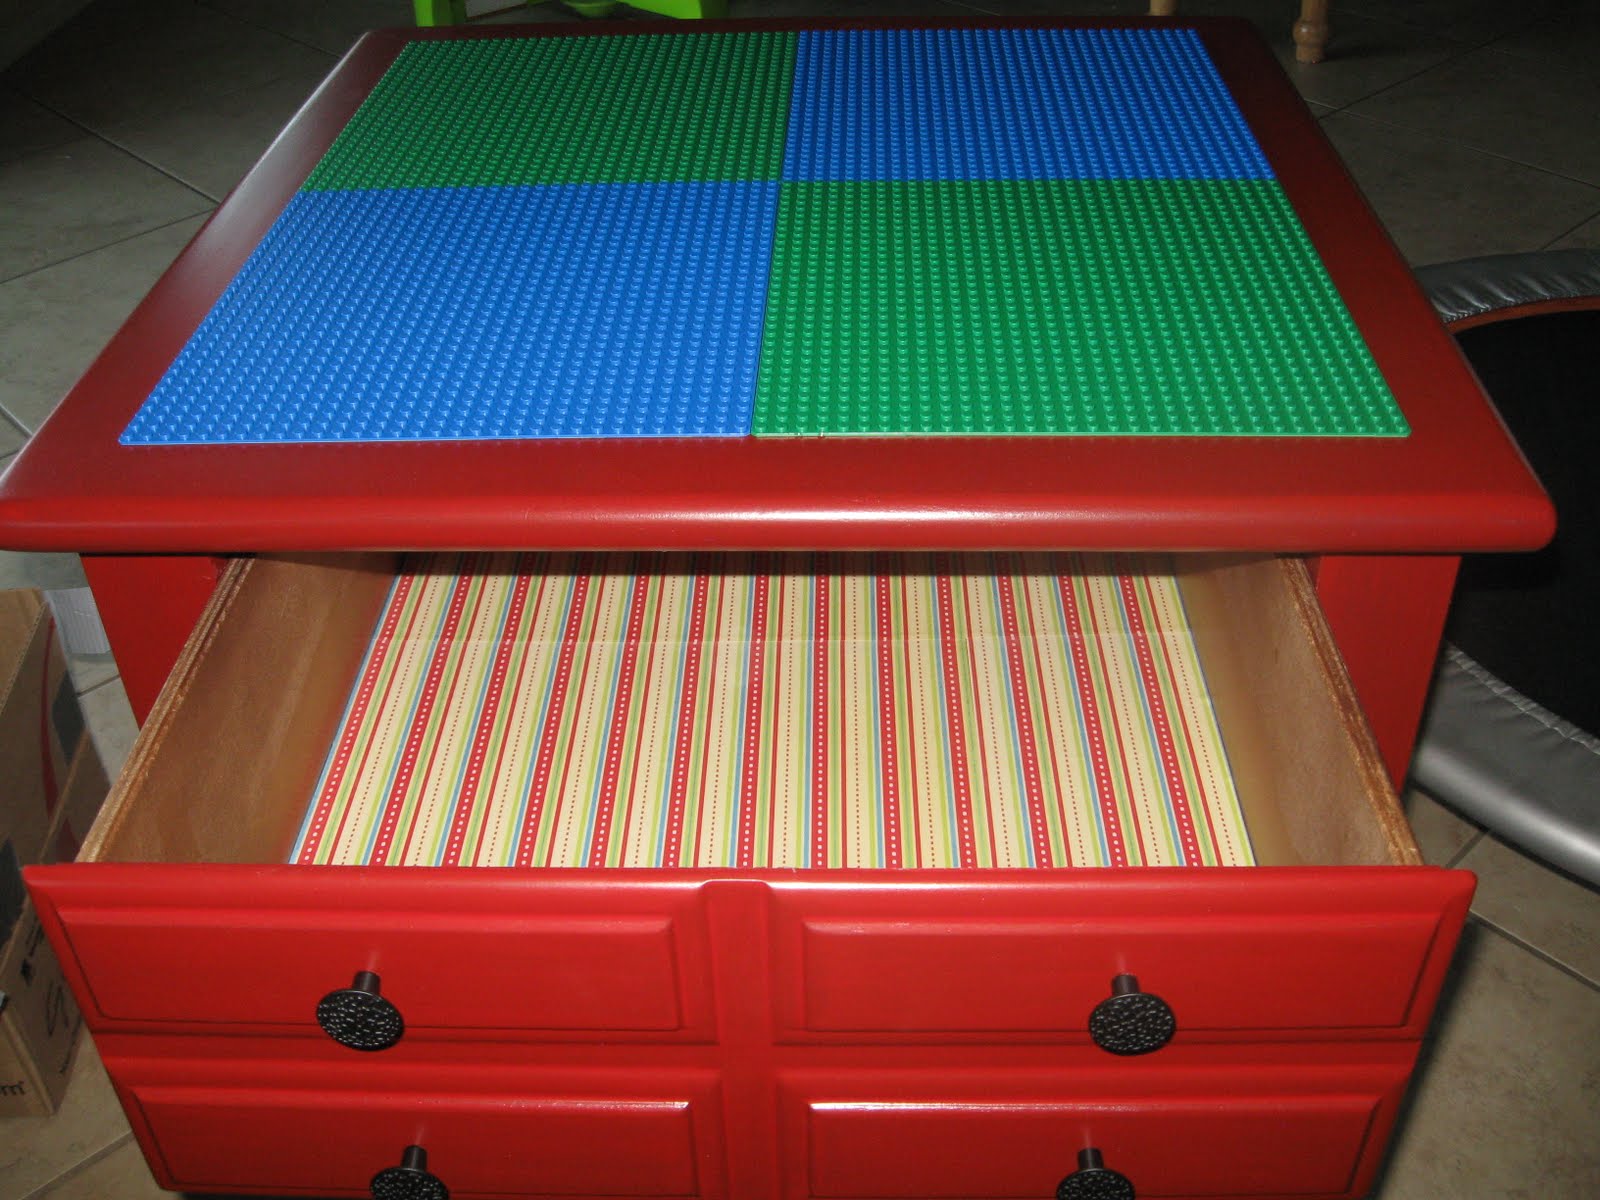
I seem to be really good about starting projects, and equally good at getting my husband to abandon projects for other things... We still haven't added the chair rail and crown molding to the bathroom upstairs. I still haven't painted my son's lego table, partly because I get lazy and partly because all the molding for the bathroom is laying across the table in the garage. We might be working on that tonight (the bathroom, not the table).

Meanwhile, we also started installing a gate to our library to keep little ones out. It didn't work out, so now I need to repair the wall and move the gate back a few inches to the stud. Another unfinished project under my belt.

I have (thankfully) been able to finish something though. Every year, since I was little, my family made Christmas candies to give away. We've continued the tradition in our family, though this is the first year my husband really grasped what I meant when I said we gave candy to all our teachers (7 kids and several teachers each adds up to a TON of chocolates!). This year, we added our boys' preschool and kindergarten teachers to our regular list.

Here's a picture of my half bucket of raspberry oreo truffles. Yum! We also made triple chocolate marbled fudge, peanut butter balls, caramel for pecan turtles and white peppermint bark.

It's amazing how far this candy goes (and how I forget that every year). This is only half our oreo truffles, the rest have been bagged in my cute origami gift bags (pictured below) and we started handing them out yesterday. All the candy took me about a week to make.

This morning, I headed over to my good friend, Morgan's and went through her fabric for my superhero capes. Since her son and one of my boy's initial is the same, she decided to make one too. After we picked fabrics, she came over to my house and we set to work. I bought just a small amount of Heat n Bond and a couple of yards of Wonder Under. We cut out squares in the various fabrics then ironed the Wonder Under/Heat n Bond to the back sides. Using my Cricut cutting mats, I cut each of the designs on my vinyl cutter. (I don't have a Cricut, I just use the mats for cutting paper and fabrics on my vinyl cutter.) I'm really glad that only one square had the Heat n Bond. It did not work very well with my cutter. So, I'll use Wonder Under from now on. They're the same price per yard at Joanns.

Here's my finished T, P, and C. The green P on the other side of the table is Morgan's. My husband designed the C shield and I did the T and P designs in my vinyl cutting program.

Now, I just need to prewash our cape fabric, iron everything down and sew up the edges! It'll probably take me a whole day (I'm slow), but I'm hoping to get it done by this weekend.

Tonight, hubby and I are going to work on a couple of our unfinished projects. Hopefully, we'll finally get the bathroom done this week. Our boys have been without their bathtub for 3 weeks now and my 2 year old does NOT like taking showers.

Saturday, November 27, 2010

Bathroom Beadboard

Last night and tonight my husband and I installed the beadboard in our hall bath upstairs. Here's a couple of pictures as of last night.

We finished up the beadboard and saved the toughest (I thought) for last since we had to cut around the edge of the vanity. We measured twice and cut once and it worked beautifully! My only gripe is that the walls aren't square (not even close) so we had to cut extra off the top or bottom of each piece to make it fit right.

Monday, we'll probably install the chair rail and get started on the crown molding. I'm hoping that we'll be done by next weekend - caulk, paint and all. Our 2 year old got his first shower today since the only bathtub in our house is out of commission until everything's caulked and painted.

I've also been working on Son #1's Lego table. It's primed and has one coat of red paint. No pictures yet. I just need a few more coats and then glaze. Latex paint takes 21 days to fully cure, so I've got to get the table done by next weekend to have the paint cured by Christmas. I'm planning on adding the base plates just before Christmas so I don't have to hide the table for too long. My plan is to work on the table during the day and the bathroom after the kids go to bed at night.

Cellphone "Decor"

My husband and I finally got new cellphones today. Ours both broke on the same day, in the same way back in August. We tend to get the exact same phone each time we get new ones. This time, there wasn't a whole lot of choice in color. It was black, or black. So, I decided to dress mine up a bit to be able to tell our phones apart.

I put "yorokobi" on the back of my phone. It's Japanese for "joy". And added a little flower to the front. Now, we'll always know whose is whose and if I ever get tired of what I've got, I can change it!

Friday, November 26, 2010

Christmas Decorating

It's been a family tradition since I was little to decorate for Christmas the day after Thanksgiving.

My boys helped decorate the tree. I had to give them a "rule" that each branch only gets one ornament. They were putting 3 or 4 ornaments on the same little branch. This might be our last year with this particular tree, though. It's 6 years old now, and some of the branches are falling apart. Son #3 pulled a branch tip off this morning and came crying to me about it.

Last February, I was at the D.I. (thrift store) in town and found an entire Christmas village for $15! I've always loved my sister-in-law's village, so I snatched it right up. I love it on top of our TV armoire.


Last year, I made this ornament wreath. I think I originally got the idea from the Thrifty Decor Chick, but I saw it on several blogs during the Christmas season. Ours never made it up on our door last year. My husband picked up a wreath hanger when he was out Black Friday shopping this morning.


I collect nativities. The first one I got is the tiny one on the far left in the picture below. My best friend, Kristin gave it to me the Christmas before I left on my mission. I first set it up in Japan and I've added to my collection a little here and there over the years. I'm not really liking the big brownish white one in the middle though, so it might be finding a new home this year. Do you think I should spray paint it and see if I like it better or just get rid of it? I'm thinking white, cream or oil-rubbed bronze spray paint might make me like the set better, but I'm not sure...

I have more Christmas decor to set up, but that's as far as my energy got me this morning. I'm trying to save up some energy so we can work on finishing our kids' bathroom today and tomorrow.

Wednesday, November 24, 2010

Bottling Cherries

After putting the boys to bed last Saturday, my husband and I got to work on our cherries. In September, I bought 60 pounds of cherries. They came prepitted (expected) and frozen (unexpected, we'd heard they'd be fresh). The frozen worked in our favor though since I'd bought way more fruit than my energy level could realistically can in a couple of days. So, 2 30# buckets have been taking up a LOT of a space in our deep freeze.

I pulled one bucket out last Thursday so they could thaw in time for canning on Saturday night. I was tired from working on our bathroom during the week and hanging out with friends Saturday afternoon, but my hubby and I make a great canning team and we were able to knock out the whole bucket pretty quick. Aren't they lovely?

We got 10 quarts of cherries bottled and I pulled the last batch out of the canner around midnight, so it only took about 3 1/2 hours to do! I also realized partway through draining all the cherries that we can save the cherry juice and make cherry pancake syrup (we eat a LOT of pancakes in this house). We'll save all our juice from our next bucket (cherry pie filling is the plan) and make the syrup after we're all finished. We're all looking forward to yummy cherry cobblers and just eating the cherries from the jar.

Saturday, November 20, 2010

Hall Bath Progress

We've been making steady progress on our bathroom this week. I finished painting the second coat on Tuesday. Wednesday, I installed a new toilet handle and new seat on our toilet.

Before:
After:
I originally bought a couple of less expensive toilet handles (they're in the plumbing aisle at Lowes and Home Depot), but after I installed them they wouldn't sit level and instead one end would hit the toilet lid! Thankfully, they were super quick and easy to install and uninstall. I headed to Lowes and picked up the above beauty for $18. Who knew a toilet handle could be so expensive?

The toilet seat has a built in toddler seat that magnetically holds inside the lid. It was love at first sight and came home with me. I absolutely love it and am almost looking forward to potty training #3 now. I'll get another one for our powder room downstairs sometime, though the master bath will not have a potty seat built in.

Replacing the toilet seat was the absolute grossest re-do thing I've done so far in a bathroom. You wouldn't believe the nastiness under the hingest of that old seat!... Well, maybe you would, especially if you have boys. I think I'll be following a friend's advice and cleaning the seat off the toilet once a month or so from now on. We'll also be replacing all our toilet seats soon.

When I picked up our toilet seat and my first attempt at toilet handles, I also grabbed new light fixtures for the bathroom. So, Thursday and Friday, my husband installed a light each night. We replaced a strip light like this one and a plain white mushroom light. Despite going from a 4 bulb fixture to a 3 bulb fixture, this new one is SO much brighter. Maybe because the light is focused down? Our new ceiling light takes 2 bulbs and replaced a 1 bulb light so overall our bathroom is very bright now.


After my husband finished installing the ceiling mount light, I think we might return it and get a white one instead. I left the molding around our attic entrance and all the vent covers white on the ceiling. The dark light fixture looks a tad bit out of place, don't you think?

I ran to Home Depot last night and got all our molding and stuff for the bathroom. Isn't it pretty? I'm getting so excited to finish up our bathroom!
I read somewhere that you should put your beadboard/molding stuff in the room you'll be installing it and let it acclimate for a week before installing it. I can't remember where I read it or when, but it makes sense to me. So, we'll be canning cherries today and I'll be working on Christmas presents next week. Next weekend, though is bathroom finish weekend (I hope)!

Tuesday, November 16, 2010

Motivation

A little over a year ago, we bought our house and I promptly slapped paint samples in every room of the house to see if I liked the color and then bought all the paint. The plan was to get the house completely painted before we ever moved in. We got close. We still had all three bathrooms and 2 bedrooms to paint when we moved in at the beginning of December last year. I finished up another bedroom that month, thanks to a good friend coming and helping me and I painted our downstairs powder room in January. That was the last painting I've done. So, we've lived with green spots on the wall of our hall bath for the last year. Here's the closest thing I could get to a "before" shot. It's from before we closed on the house, so you don't see the green spot that lived on that wall for a year.

Two days ago, I just decided, "I'm going to paint the bathroom tomorrow." It didn't matter that I'm pregnant, exhausted, sick and have a pile of laundry taller than my 5 year old in every bedroom, I got the urge and ran with it.

I got the bathroom clean, gutted and taped for painting when I ran out of energy yesterday morning. So, I spent the afternoon being lazy and getting nothing done so I'd have energy after the kids went to bed to put on the first coat. I talked my husband into removing the old vanity light fixture and got to work. It only took me about an hour and twenty minutes to paint all the walls and the ceiling. After one coat of paint:

This is (obviously) the shower. I didn't bother painting all the corners at the ceiling because we're going to install crown molding. You can't tell from this picture, but the paint only goes to about 3 feet from the ground. We're going to put in beadboard once I'm finished painting. I've got to do another coat tonight. I went to Home Depot this morning and picked up new light fixtures, a new toilet seat (with a built in toddler seat!) and a new toilet tank lever. I'm hoping that we'll be done painting and get everything installed and the bathroom decorated by Thanksgiving weekend, but it really depends on how long my motivation for this project lasts.

I told my husband last night that I want to paint our bathroom the second weekend in December. I'm tired of the yellow spots on the wall...

Son #3's birthday cake

Every year, I try to throw my boys a birthday party, complete with a birthday cake I decorated. I haven't been very good this past year, but I decided to make #3 a birthday cake for his 2nd birthday.

He picked a blue train. I bought black glitter gel stuff because Micheals was out of the plain black frosting and I thought he'd want a car cake (black for the wheels), so I used it to outline the train and for the smoke instead.

Here's my boy's first look at his birthday cake. I think he's pleased.

I'm not a big fan of cake, so if I'm going to go through the effort of decorating one, I put a filling in. My son wanted a chocolate cake, so I filled the middle with homemade raspberry jam. I was lazy and instead of measuring out the shortening for the frosting, I just used all butter - bad idea. My frosting didn't turn out great at all (for decorating, it tasted fine), so I will never take that "shortcut" again. I'm not sure if that was the problem, or if it's just been a while since I've made decorator frosting but I will always follow the recipe exactly from now on.

Monday, November 1, 2010

Dilly Beans

When we were in Washington a few weeks ago with my in-laws, we tried Dilly Beans (pickled grean beans) and LOVED them. I would eat them until I gave myself a tummy ache, over and over again. They were so good! I was really excited when I found out that we could get a whole case of fresh green beans from Bountiful Baskets this past weekend. I asked my husband what he thought of helping me make dilly beans on Saturday (he said yes) and then called my mother-in-law to get her recipe. They were SO easy! This was the first vegetable I've ever canned (you have to pickle any veggie you can in a water bath or steam canner and I don't have a pressure canner yet.) and it was much easier and less messy than fruit. And I must say, my hubby and I make a pretty good canning team!

I put in a movie and popped the ends off the whole case of green beans while my husband drove all over town cleaning all the grocery stores out of fresh dill. Then it was just stuff everything in, pour the brine on top and process. The clean up was much nicer than fruit canning too. I didn't have to deal with sugary stickiness everywhere. We ended up with 28 quart jars of dilly beans. Aren't they pretty?

We have to let them pickle for a few weeks before we can open our first jar. We're planning on pulling a jar out for Thanksgiving. I'm so excited!

Saturday, October 30, 2010

Christmas Ornaments

My friend, Morgan is doing a fun Christmas ornament exchange in December. I thought long and hard about what to make for the exchange. I wanted to do these fun wood and vinyl ornaments since they would cost the least amount of money ($0), but since energy is at a premium around here for me, I decided on less time consuming but more expensive ornaments. These are still fairly inexpensive per ornament, I just had to buy the stuff to make them. My 4-year-old helped me make a few the other day, so they’re also pretty easy.

The fake snow was the most expensive part (I used a 40% off coupon at Michaels). We don’t do glass ornaments in our house, the balls are plastic. I just grabbed a bunch of mini-ornament packs that fit inside the ball and I hung a Santa from the cap. I also got some mini-Christmas trees, but I haven’t figured out how to easily have those hang from the cap, so I’ll probably take them back and get more Santas.

I’m getting into a Christmas mood early this year. I don’t even know yet how many ornaments I need for the exchange. It’s fun to make stuff though, especially when they don’t take much time at all. I just couldn’t resist.

Friday, October 22, 2010

Update

I'm sorry I haven't posted in so long! My oldest son had Fall break from school so we went to Washington state for a week and a half to visit my husband's family. We've been home for almost a week, but I caught a cold right at the end and I haven't gotten over it yet. Along with my cold, I'm expecting baby #4 in the Spring, so I've been sick with that and the valley fever hasn't gone away. My midwife told me to expect to have valley fever for a good 6 months (it can go away sooner, but she's not expecting it). Everything combined makes me very tired right now. Tomorrow, my husband will be helping me with a project that I've had on the back burner since we bought the house. It shouldn't take long and I'll try to post about it and a few other things I need to start working (when I get the energy) soon.

Tuesday, October 5, 2010

Craft Night and Crafts

I was talking to my mother the other day and she told me that she'd been watching for a post about how my craft night the other day went. That reminded me that I've been really bad about blogging lately. I'm still sick, although I can feel the end of the valley fever in sight. I'm hoping another week or two will be the end and I can come back strong and finish a few things around here (like the laundry...).

Craft night went really well. I spent a good chunk of the day cleaning up my downstairs for the evening, so I had no energy to do anything but sit and chat that night. Since that's half the point of my craft nights, I didn't feel bad at all. We had a good turnout and everyone had fun (as far as I could tell). Morgan and I are already brainstorming ideas for our next craft night at the end of January - after all the holidays. We'll get more details after my health returns and when it gets a bit closer to the New Year.

So, I didn't get anything made that night. A couple nights later, my husband and I were at a loss for what to do and all my craft projects from our church craft night at the beginning of September were sitting unfinished in the living room. I convinced him to help me put together the candy corn topiary kit I'd bought and hadn't done. I'm proud to say that with my husband's help, we had this baby finished in 40 minutes! Super cute, huh? I'm thinking of doing two more at different heights and maybe a set of Christmas tree topiaries, too. You can also see the Spooky board we had available for my craft night last week.

Since it was General Conference weekend and I hadn't (and still haven't) hauled my craft table back upstairs to the craft room, I sat down during Saturday's sessions and finished the rest of my kits from early September. Here's my Christmas Stackers. I couldn't leave well enough alone though. I called my friend who'd cut all the vinyl for this project and got the name of the font, so I could make mine double sided. :) Obviously, you can't see that in the picture, but it will look great from both sides on display at Christmas this year!

Last, but not least, I finished up the Christmas Advent calendar. It's made from a mini-muffin tin, cool, huh? I dry-brushed black paint on the edges of the paper since I don't have an ink pad for that. The instructions said to tie some ribbon through the pre-drilled holes that don't exist, so my husband will be digging out a drill bit that goes through metal before Christmas and fixing that. Plus, I think I'm going to spray paint the pan white to be a little more Christmasy and a little less kitcheny.

Please excuse the horrible background. I bought the vinyl tablecloth for craft night so I wouldn't get paint on my dining table and I haven't put it away yet. Plus, you can see the fun water-coloring my boys were doing while I crafted on Saturday.

I'm hoping by Thanksgiving to have a few things crossed off my To-Do list, but I have to feel better before I can start anything new. It drives me CRAZY sometimes!

Wednesday, September 22, 2010

Fall Canning

This year I'm not doing as much canning as I would like. Being sick and needing to rest is really taking up most of my time right now. However, I'm crazy and I bought bulk fruit anyway. I just won't be getting anymore for a while.

My friend, Morgan and her sister-in-law came over on Monday and we bottled peaches. We had another friend show up in the evening and we all made peach pie filling, too. All told, we got almost 50 quarts of peaches and 17 pints of peach pie filling done Monday, but we were up and working on them until 1am! We got started really late due to some unforeseen setbacks.
My husband helped me wash, label and put away our share of peaches last night. Storing them above our cabinets is a great way for us to see and remember to use them and it's a nice kitcheny decoration (I think).We'll be working on our 3 cases of pears later today. Hopefully, we'll get done before 1am this time!The one fruit I'm willing to break my "I'm done canning this year" decision for is raspberries. We LOVED the raspberry jam I made last year and we've been out for several months. They just went on sale today, so I'll be picking up a ton and making jam tomorrow. I'll probably do freezer jam because it's quick, easy and makes the smallest mess.

Morgan and I also went out and started picking up all our supplies for Craft Night next week. Son #2 fell asleep in Morgan's van on the way home from Joann's. Isn't he cute?

Wednesday, September 15, 2010

Under the Weather

I wanted to let everyone know that I haven't forgotten my blog. I recently (4 weeks ago) came down with valley fever and will have it for at least a few more weeks. That combined with a couple of other exhausting things around here has zapped my energy - including my crafting energy. My husband commented tonight that it's odd that I haven't made anything in a while. I also spent a week and a half doing a LARGE vinyl order for a friend of a friend. I'm thinking and designing in my head several upcoming projects, I just haven't had the energy to start any of them.

So, with that in mind, I thought I'd share some of my upcoming projects with you. My next big-ish project is our upstairs hall bathroom. We'll be painting it, adding crown-molding and beadboard around the room. I'll also (finally!) get to decorate it with all these cute safari themed things I've been collecting for the last year (seriously). We'll also change out light fixtures, paint and add hardware to the vanity. Plus, I'll be framing in the mirror above the sink. I'm also hoping to paint the master bathroom and an accent wall in our nursery before the end of the year. I'm hoping to also get my boys' bedroom curtains made and the furniture refinished in the nursery.

I hope I get my energy back soon, because my plan is to have all that finished plus all my homemade Christmas presents for my boys done by the end of the year. I'll be adding a list on my sidebar detailing the above to track my progress.

Friday, August 27, 2010

The Loft

Here's what my loft looks like now that I'm done*.

Well, first I'll show you what it looked like back in March before I started all my changes. These pictures are a bit embarrassing because I didn't clean up beforehand. When you come up the stairs and look left, these are pictures from left to right around the room. Basically, we spent almost no time in this room and it was our catch-all junk room before the transformation.
I started with the blue lovesac above and picked out the colors for our loft from that. I ended up deciding against keeping it and we sold it on Craigslist a while ago. But that's where I got my color inspiration from. I decided to do blue, red, green, orange and yellow (which is our wall color) in our loft. Our loft is 16 feet square, so I think it handles the large variety of color really well. I also wanted it to multitask as much as possible since the room is so big. I think I succeeded.

Now the After. These pictures are taken from the same spot as the above Befores.

Sorry about the bad lighting I wanted to take the pictures with everything in its place so I took them at night. During the day, toys and books reign supreme in here.

Our Pediatrician's office has baskets of books in every examine room and in the waiting area. I loved the idea; so I took the baskets I used to store on our changing table and use them on our coffee table to store the books. The boys love that they can see the titles without dumping them out and they are pretty good about putting them away now too, which I love.

I spray painted the orange lampshade on the lamp above to help it coordinate with the loft even more. You can also see 3 of our 5 bean bag chairs. I picked them up in our loft colors from Walmart.com. It makes for great around the room seating.

Son #1 comes home from school and does his homework on this kid-sized Harry Potter table (below) that I bought in 2001 at Big Lots. It's one of my best impulse buys ever.

You can also see our expedit bookcase behind the table. Our older kid toys hang out in it. The baby toys are in the coffee table across the room. We'll see how long the organization last, but at least all the toys go back in the bins at the end of the day. We also have some larger toys that sit on top of (but still in reach of my older boys) or next to the bookcase .


I thought the area above our window looked a bit funny since I hung the curtains high with the angled/vaulted ceiling, so I filled in the space with the first line of one of my boys' favorite Primary/Children's Songs. I think it makes the window look more finished.


I put the art easel in the corner of the room. The tray for the chalk/markers faces the wall to keep them "out of sight, out of mind" for my youngest boy. We also have an art apron for each of my boys to wear while using the easel. Eventually, I want to get/make a hook rack to hang the aprons on the wall next to the easel. I just haven't done it yet. You can also see our toy box under the window. It makes a great window seat for checking things out outside.

And here's the front view sans pillows of the couch. You can read more about our couch here.

This room took me a long time (almost 6 months!). I made or remade most of the things in the room and it feels great! I love how the loft turned out and I love that my family uses the room now. We usually spend a large chunk of the day in there.

*I still need to paint the buffet and I'll be making the endtable next to the couch into a lego table for my boys (for Christmas). But I'm taking a break from this room and I'm going to work on something else for a while.

LinkWithin

Blog Widget by LinkWithin