Thursday, June 30, 2011

A table "remake"

Remember these little blue side tables? Well, after changing my mind a million times and finding a great new bookcase, I now have to place/purpose for either of them in my home. I did decide something fun to do with them though.

Here's my first attempt (first meaning, I have to redo it):

I cleaned the table and sanded the top smooth and painted it key lime from Rustoleum.
Then, I added a vinyl stencil in a damask pattern, taped off the bottom and painted the top black.
After it dried, I peeled the vinyl stencil off and here's where it went wrong. My paint job stuck beautifully to the blue paint, but that paint wasn't sticking very well to the original brown stain anymore... Sadly, I peeled all the way to the stain in a few places.
I've since sanded the tabletop to the bare wood and repainted the green. I'm going to try the stencil again this week (I hope). I also started the other table and it will be coral. Oh, and the base needs some glaze, don't you think? I can't wait to see how it turns out. My boys told me they want the green table in their room, they like it so much.

Wednesday, June 29, 2011

The first dresser is DONE!... mostly

It took me a while to decide on the color and what exactly I wanted to do with the dressers that will be going in my bedroom. Once I decided though, I got it done!

I chose to go with Slate Blue from Rustoleum and then use this idea from Addicted 2 Decorating to add a silvery color to it. I tested all my color options with that technique before deciding on the blue.

Here's my before:
First, I washed the dresser. It was when I did this that I realized they aren't green and what I thought was glaze is in fact dirt and lots of it. Soap and water wasn't enough, so I bought Bix TSP no rinse substitute. It worked great and looking at the before and after side by side just makes me realize how gross it was before.
So, after cleaning everything, I primed the drawers inside and out (every surface was that blue/green color) and painted the insides Rustoleum's Heirloom White. Then, while watching The Prince & Me, I taped everything off.

I painted the drawer fronts slate blue and then dusted them with Krylon's silver spray paint.
Then, I started on the dresser itself. *Furniture painting tip: Always paint the furniture upside down first, then finish the coat with it right side up. That way you won't miss any surfaces.*

My friend, Morgan came over this week and washed the dresser while I primed and painted the insides of each drawer. (Thanks Morgan!) After finishing up the drawers, I had my husband help me move the dresser outside and primed it. I used Rustoleum's x2 primer. Works great and it's pretty inexpensive. Primed upside down, wait 20 minutes, flip, prime right side up, wait 20 minutes, flip, paint slate blue, wait 20 minutes... It took a few hours and several coats, but I finished it up in one day. Wahoo!
Here it is waiting to be flipped for the silver 'dusting' layer.
After the last layer dried, we brought it inside and matched the hardware to the drawers. Each piece of hardware is slightly unique, so we had to try several before finding the one that matched the holes before we could reattach them all. Here's our "finished" beauty (I still need to add drawer liners). I LOVE how it turned out - the perfect shade of silvery blue for our room! This is my favorite remake so far, I think. My husband is excited to finally get his clothes out of a plastic bin soon.


I'm hoping to get started cleaning the rest of the furniture soon. My goal is to refinish all the furniture in my garage by the end of the summer and get it out of my garage and into my house.

Tuesday, June 28, 2011

Hardware refinishing

One of the first things I did with my new furniture was take all the hardware off. It'd been painted the same color as the dressers and I needed to get all the paint off. A few months ago, I found this tutorial through a linky party and bookmarked it. I pulled it up and followed the directions. I had to do it twice because I didn't let the hardware soak long enough the first time and still had paint in the deep crevices.


I sprinkled baking soda in the bottom of a water filled large pot and then put all the hardware in. The second time I did it, I fished each piece out of the pot one or two at a time and used the sprayer at my kitchen sink to spray the paint off. No scrubbing or rubbing involved. It was great! So, I went from the green uglies above to these beauties:


I'm not sure you can tell in these pictures, but each handle and decorative piece is just slightly different from each other.

After getting everything cleaned up and organized, my boys helped me lay out all the hardware for the dressers and I spray painted them satin nickel from Rustoleum. I think they turned out looking more pewter than satin nickel. I love how they turned out and they're perfect for the look I'm going for on my dressers.

Monday, June 27, 2011

Starting on the Master Bedroom

My husband and I decided a few months ago that the next room we would tackle/decorate would be our bedroom. It took me a while to find a color scheme I liked that I could find fabric to coordinate with. I finally found a rug that I loved and went with that. I'm doing a silver-blue, chocolate, tan and cream color scheme for our room. (I actually didn't buy the rug because when I went back to get it the blue I'd remembered wasn't the blue in the rug but I wanted to stick with those colors anyway.)

I decided I wanted a white/off-white 100% cotton quilt for our new bedding. White, so I can change up the accessories without buying a whole new bedspread and 100% cotton because I read a tip that natural bedding allows your skin to breathe while you sleep. I finally found an ivory king-sized quilt that I liked and fit my criteria on overstock. Here it is on our queen bed:


The fabric in the pictures is what I've gotten so far for our room. I wrapped one of our old throw pillows in the fabric and laid it all out to see what I thought of the ivory with the blue. I really like it. As I add more things to our room, I may try bleaching our blanket to a more off-white, less ivory color, but we'll see.

Our first night with our new quilt, we slept with our ceiling fan off because I wanted to see if I would get super hot as usual in our AZ summers. I was pleasantly surprised that I slept great and wasn't over-hot. We love our new quilt and will never buy a synthetic blanket for our bed again.

Sunday, June 26, 2011

The bookcase

Soon after getting my garage full of furniture, I dug out my $5 bookcase, cleaned it up and put it and the lamp in our living room. I then moved a bunch of our fiction books to the living room.

Obviously, I need to rearrange our gallery wall now, but I probably won't do that until I'm ready to repaint and finish filling that wall with frames. I'll also eventually get an extension cord for the lamp. There's actually a plug on the other side of the bookcase, but I wanted the lamp plugged into our half-hot outlet so we can turn it on/off with the light switch. Until then, the cord is stretched as far as it'll go to reach that outlet.

Saturday, June 11, 2011

My first hairbow


Here's the first hairbow I've ever made (sorry about the bad photo). My daughter will be sporting this cutie (along with a super cute dress) at church tomorrow. I've been wanting to make hairbows for a while, but just couldn't get myself to go spend a bunch of money. This one I made for free. After baths tonight, I was thinking about the black dress I have for Daisy for church tomorrow and wanting a bow to go with it. I remembered I had this red, white and black ribbon and some small hair clips I never use, so I put it all together. I sort of followed this tutorial - I just used ribbon instead of felt. I see many more hairbows in my daughter's future!

Thursday, June 9, 2011

A Craigslist Story

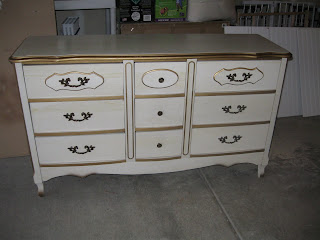
My husband has been without a dresser for about 2 1/2 months now. His clothes are in a plastic bin on the floor. So, for the past 3 or so months, I've been searching Craigslist for a dresser to fit this particular wall in our room. I finally found one this past weekend and I sent my hubby to pick it up.

Here's the dresser he brought home. It's solid wood, but when I saw it in person, I was under-impressed with it. I'm probably going to refinish it and resale it because I just don't like it all that much.


Before he left, he told me he hoped that was the last dresser we'd buy for a while. He said I like looking at dressers on Craigslist too much and was afraid I'd find another one I'd want. Oh, how right he was...

I bookmark any listing that I like but don't necessarily need or it's priced too high for me - just so I can drool over them longer. My favorite listing search is 'dressers' so I have quite a few dressers bookmarked. Monday night I was perusing my bookmarks when I saw a 10 piece french provential bedroom set I'd been wanting but we really don't need marked down from $700 to $250! I couldn't pass it up! Especially since I'd actually contacted the owner several weeks before about 2 of the pieces and she'd wanted $250 for just those two. I told my husband right then that I was going to get them the next day - no options. He was game since the price had dropped so much and he knew I'd been watching that listing for so long.

When I got to the lady's house, I found out that it was actually leftovers from an estate sale and 
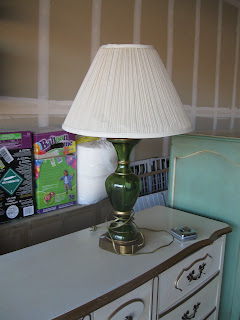
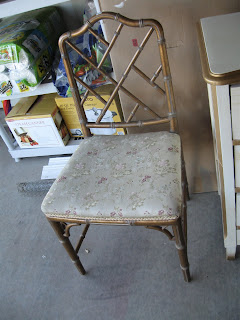
everything left in the house was set to be picked up by a local thrift store in a couple of days. I drooled over a couple more pieces of furniture I knew my husband wouldn't be pleased if I brought home, but I also snagged a heavy, solid wood bookcase for our living room, a cute green glass lamp, a bamboo chair and a small magazine holder (for my friend who helped me load it all up and bring it home) all for $12 dollars!

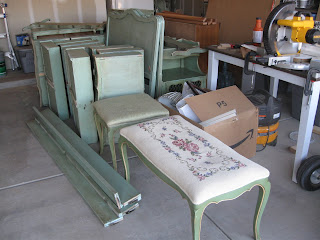
Here's my lovely new furniture. The bedroom set came with a 5 drawer dresser, 2 nightstands, 2 3-drawer dressers, a vanity that connects the small dressers, a vanity stool, a bench, and 2 twin beds (headboard, footboard and matching rails). After getting it all home and realizing how heavy duty/sturdy this bedroom furniture is, I'm hoping my husband will let me keep it all (instead of refinishing and reselling some like I first thought).

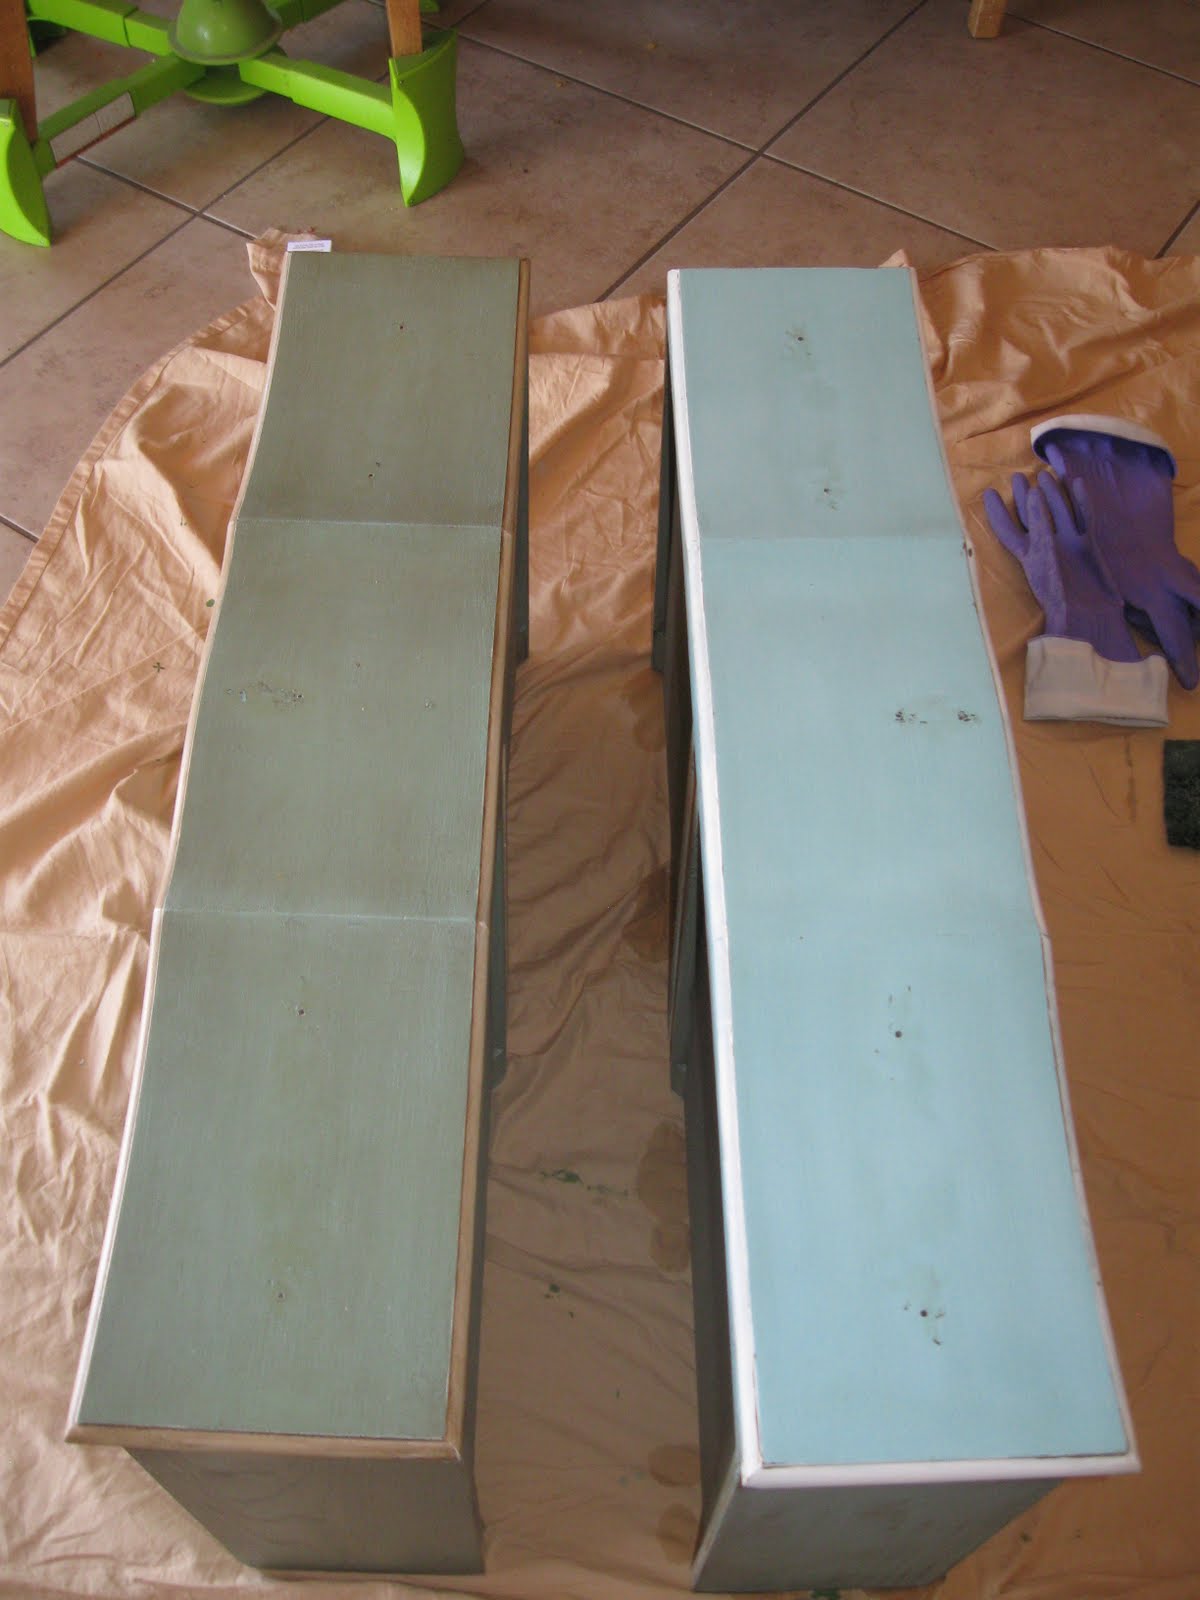
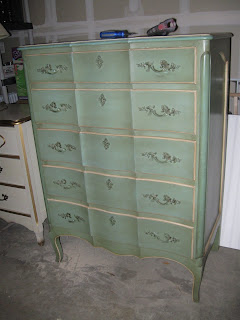
This tall dresser along with the vanity and small dressers are going to be blue and go in my bedroom. (I'm just starting a "re"do of our bedroom.)

These cute nightstands are going to be pink and white when I'm finished with them.

The bedframes will be white when I'm all done. In the picture below, you can see the headboards sticking up out of the middle. One of the footboards is on the front dresser and the rails are on the ground. In the top left corner, you can see the vanity top that connects the 2 smaller dressers.

The square stool goes with the vanity and will be blue also. I'm not sure what I'll do with the bench yet (maybe white?). Buried in the back (which you can't really see) is my new bookcase.

My lamp got a new drum shade and now lives in my living room.
This bamboo-looking chair will get a paint job (not sure on the color yet) and some new upholstery and live in our office - eventually.
I promised my husband the first piece I'd finish is the tall dresser so he can get his clothes off the floor. I'm excited about my furniture and definitely have a lot of work ahead of me!

Wednesday, June 8, 2011

Jigsaw bookcase

Last year when I was working on our playroom/loft, I really wanted to get this fun jigsaw bookcase to hold all my kids books. I just didn't want to spend the money. Now, a year later, I finally broke down and bought it. I still got a decent deal though. Have you ever bought something from Amazon warehouse deals? It's hit and miss, but you can sometimes find good deals on things you're looking for. This one, I got an extra $12 off and it is in perfect condition. My kids love it and I love that it has room to add more books.

Friday, June 3, 2011

Window framing!

My husband was sweet enough to work on this when all I could do was sit there and tell him how to do it (I was still pregnant :)
He cut a pre-primed mdf board to fit the bottom of the window and added door/window casing around the edge of the window. We picked the same molding that frames all our doors for continuity.After finishing that up, we caulked all the edges and painted the whole thing in Swiss Coffee to match all the molding in our house. It turned out better than I was expecting and I LOVE it! The plan is to do this to all the windows in our house. Now that one is done, I'm hoping to get a window done a month until we're finished - but that's probably wishful thinking. We work much slower than that.

Here's a picture of the edge of the bottom molding. I had my husband cut it at 45 degrees and then straight for the bottom and I love how it looks.

Here's the before we painted and added the window framing and the after:


Our next molding project will be finishing up the crown molding and the mirror in the hall bathroom. I can hardly wait!

Thursday, June 2, 2011

Nursery Pendant Light

We mostly finished up the nursery before Daisy was born, but I'm only now getting around to posting about it.

I picked up a ceiling hook kit at Home Depot for a couple of dollars and had my husband install it. We weren't able to get wiring not intended for the interior of walls to make a long cord for our light, so I've got it plugged into an extension cord. I'm going to be covering the yard "rope" I made to hang the ball with some extra nursery fabric. I have a good friend finishing up the crib bedding and once I get my extra fabric back from her, that'll get done.


Meanwhile, it's a wonderful middle-of-the-night nursing spot. My little girl loves to have this 'night light' on and it gives a nice pale glow to the room. Just enough light for me to see, but dark enough to sleep comfortably. It's great and I'm so glad I took the time to make this light.


PS. I still haven't found a black cushion for my rocking chair, but I will.

Wednesday, June 1, 2011

Canning Applesauce

This past weekend, I bought a case of apples through Bountiful Baskets, a food co-op we participate in occasionally. It's been MONTHS since the last time I canned and I've been really missing it. I'm weird, I know.

Anyway, I've tried applesauce before and it didn't turn out. After asking my MIL (a canning expert) for some tips, I tried it again and it turned out great! We got 10 quarts and 2 pints, plus we got to use our food dehydrator for the first time and did 5 trays of dried apples (my husband LOVES dried fruit).


With my little girl only 3 weeks old, we did it over Memorial weekend and my husband did a lot of the work. We really enjoy canning together, so it worked out well. I'm hoping to do a lot of canning this summer and fall, so this is just the beginning. I have about 40 lbs of berries in my freezer waiting for me to turn it into jams, syrups and pie fillings. I can hardly wait!

LinkWithin

Blog Widget by LinkWithin