Sunday, May 30, 2010

Memorial Day Weekend Projects

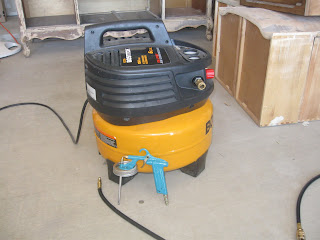
We have a community wide yard sale coming up next week. I'm gearing up for it by cleaning out some closets and hauling things down to our garage. Add to that, my next door neighbor whose also getting ready for the yardsale just replaced her daughter's bedroom furniture and wanted the old stuff out of her garage more than anything and a successful hunt on Craigslist - my garage is packed! I spent yesterday working hard in our garage painting furniture. Meet my new best friend:I love this paint sprayer! The finish is more even than spray paint from a can and I can custom pick any color I want (though at the moment I'm doing black and Rustoleum Heirloom White). I also don't have to deal with brush strokes. I'm still learning how to use it, so the finish isn't as nice as it could be. A couple of weeks ago, I took it to a friend's house to paint the outside of her chicken coop. It only took about an hour and a half and 3 cups of paint for the whole 8 ft. by 6 ft. coop! I've been itching to use it on my own stuff since!

I asked my hubby if I could get rid of our computer desk at the yardsale next weekend, if I could get it re-painted in time. He said yes, and I got to work. Now, I'm loving this desk again, so we're keeping it!
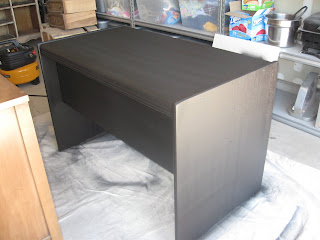
I finished the corner piece and this is the bigger piece. We stripped all the peeling paint off the last piece and moved it into the garage, but we were both worn-out by then so it's first on the list for tomorrow!

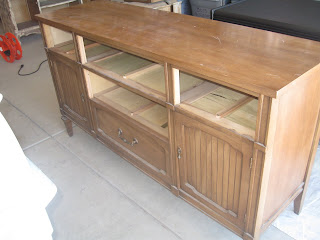
Here's the buffet I found on Craigslist this week. It came with a china cabinet (pictured below) and I had the guy deliver it for a total of $160. Both pieces still have their original hardware and are in great condition, they just need a coat of paint! This buffet is going to get the green paint with black glaze treatment I originally planned for my other buffet in this post and will go in our loft. It coordinates a lot better with the orange nightstand/endtable I finished earlier. My other buffet will now be going in our master bedroom, once I get that going (and after I finish our loft).
Here you can see all the stuff in our garage. It's all our yardsale stuff and the furniture I bought from my neighbor. It's all Ikea furniture. I'll be painting the armoire white and filling it with shelves to store boardgames in our loft. The dresser will get painted blue and go in my boys' bedroom. The toy box will be white and also go in our loft and I'm going to resell the toddler bed at our yardsale since my neighbor insisted that I buy the whole set from her.
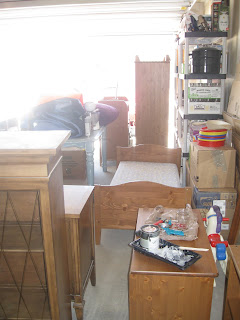
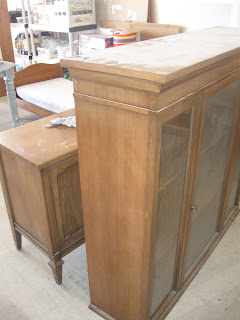
And here's a not very good picture of my new china cabinet that I'll be painting white and putting in my dining area. Does anyone know how to remove the gold colored diamonds on the glass? I tried a razor blade and it barely scratched it. I've thought about replacing the glass, but it has a trim on the inside holding the glass in place that I'd have to remove first and the possibility of broken glass from that attempt doesn't thrill me. I've thought about taping off everything and painting the diamonds silver, but is it worth the effort? Please let me know your thoughts!
So with all that, our garage is reminding me of before our move when our garage was stuffed with furniture that wouldn't fit in the house. This time, everything just needs to be redone first! I'm hoping to get most, if not all of these projects done this week before the garage sale. Hopefully, we'll be able to park both our cars in the garage Saturday afternoon!

Monday, May 17, 2010

"Wonderful Wednesday" Craft Night

You're Invited to a Wonderful Wednesday Craft Night!

Who: Anyone local. If we don't know you personally, you'll have to prove you're a real person before we'll give you my address. :)
Where: My house
When: Wednesday, June 30th
from 7pm 'til whenever

We'll be doing a potluck snack, so bring your favorite finger foods!

My friend Morgan and I decided to put on a Super Saturday type craft night together. We'll be doing six different crafts that night. You can pick and choose which one(s) you'd like to do from the following:

Just click on the names to see more information about each of the projects. My husband made a really nifty order form for us so just email me (allthingscreativeaz(at)gmail(dot)com) and I'll send you the order form. All orders and money need to be in by June 16th so Morgan and I have time to get all the crafts ready for the big night. We hope to see you there!

Family Home Evening Boards

These FHE boards are so cute! Each board measures 6 in. tall and 24 in. long and comes with 7 tags.

There are 7 different assignments: Prayer, Song, Scripture, Lesson, Activity, Prayer and Treat. The boards will come pre-sanded and drilled for the pegs. Vinyl colors available are black, dark brown and beige. The ribbon for your tags will match the vinyl color.


We have three different options for fonts (below). The names on your tags will be in the same font as the board you select. Please let us know what names you want on the tags on the order form. You do not need to give us 7 names, but you will get 7 tags. If you don't include names, I'll assume that you don't want names on your tags. Please know that long names (more than 6 letters long) will probably look a bit squished. I'm not sure since I haven't done a name longer than 6 letters. If you'd like to know what your names will look like (squished or not) beforehand, let me know and I'll try to email you the tags before I cut them out.

Paint color options will be green (similar to the one pictured above), black, chocolate brown, and antique white. If you would like a different color, you'll need to bring it with you that night.


Large Dice

These are large dice, each measuring 3 1/2 inches cubed. They will be sanded and ready to paint. We'll also have cardstock stencils for each of the numbers on the dice.

We'll have a variety of paints available, but if you have a specific color you want your dice to be please bring the paint with you.

I barely was able to get the paint dry before my boys were off playing with them!

Christmas Countdown Blocks

I found a tutorial online for these and thought they were so fun! Morgan and I made our own little "kit" for these blocks. and then turned the "kit" into this! So cute, huh?

Please specify which Christmas color you would like the paper to be, red, green or blue/white. We can't promise we'll be able to have the exact color scheme you ask for since Christmas scrapbook paper is hard to come by this time of year, but I do have a lot of paper I bought last Christmas and we'll try. If anyone has any Christmas scrapbook paper you'd be willing to sell, I'd love to take it off your hands. Just email me. Also, we'll have a variety of Christmas colored paints available for painting your blocks and base. The vinyl comes in red, white or beige. Beige is pictured above.

Giant Scrabble Tiles

I'm really proud of this idea because I actually came up with it all on my own!

We decided to do two different sizes. Here's an example of my 12in. Scrabble tiles. I'm going to spell out the words "PLAY ROOM" to put in my loft/play room upstairs. I decided to make the tiles different colors to go with my play room color scheme, so here's the P and the R:


I thought that 6in. Scrabble tiles would be fun too. Here's a fun layout I decided to do in my bedroom with pictures of me and my hubby on the wall. We'll see how it looks when I get it all put together. My husband even thought they look nice!

The available colors you can choose from for the vinyl letters is black, dark brown, beige, white and light gray (pictured above).

"Ladder" Picture Frames

Here's another easy, fun craft for craft night. "Ladder" picture frames.
The frames will be ready to paint. We'll have a variety of fun ribbons to choose from, but not necessarily the ones pictured below. If you would like to have the frames a particular color, please bring your paint with you, since we can't guarantee any particular color.


The red one is one I made at Enrichment years ago and the green one we made last week.

Bath Salts

Craft #6 for Craft night!
Homemade bath salts are really fun and easy. They make a great gift and are an inexpensive way to pamper yourself. We'll have all the ingredients, along with a variety of fragrances to choose from. We'll also be providing a regular mouth pint jar to put the salts in. No promises, but I'll try to post my recipe after craft night.

Crafting Craziness

This last week was a busy crafting week for me. My friend, Morgan and I have been working on putting together a big craft night. We decided to pick up all the supplies we'd need to make each project (we've decided to do 6 different crafts) and make them this past week. We covered my kitchen table Tuesday night and I didn't get it completely cleaned up until Saturday morning! I kept going after Morgan had to go home, and it took a while to get everything done, partly because it took me a day to find my stapler and partly because I kept getting distracted and starting other projects!

Here's my fun, messy kitchen table, half cleaned up after finishing a couple of things. If you look close, you can see 7 different projects on the table: large dice, an FHE board, Christmas Countdown blocks, red vinyl for some 6 in tiles, refrigerator magnets, bath salts, and the "ladder" picture frames. Not all of that was for my upcoming craft night. I got a little crazy with crafting and just started doing all sorts of fun things. I've even come up with at least another 6 ideas or so for another craft night. Hopefully, this one will be a success!

Monday, May 10, 2010

Project Loft Redo

Last week I posted about my nursery curtains. Well, here's a better picture. Thought you might like to see.

I would have finished my loft curtains long ago, but just as I was starting to sew up the last panel, my needle hit a sewing pin just wrong and landed my sewing machine in the shop for a week! I was NOT happy about it, but it was nice to find a repair shop/fabric store just a few miles from my house. I got my machine back this weekend and went to town today. Here's a close up of my new loft curtains:
And this is what it looks like on the wall. For some reason, my husband and I thought the dots were bigger before I hung the curtains... So I'm not sure how I like them. I might add curtain grommits to them and see if that improves my feelings. Up close, they're really cute and the colors are perfect with the furniture/decor we'll be adding to the room over the next few weeks. (What do you think about them?) You can see a corner of the blue Lovesac I got off Craigslist that was the jumping off point for the colors in this room. My orange nightstand/endtable looks really nice with the curtains too.
I've slowly been working on the next piece for the loft. My buffet/console table! Here's a before:
I decided since the previous paint jobs were so bad, that I'd strip it and then repaint it. I actually did it! Here's what everything looks like right now:

I know it doesn't look that great, but it's a BIG improvement over the before. I'm so glad I stripped it all off because the grooves on the feet are a LOT deeper than I thought at first. I'm getting really excited to see what it'll look like when it's all green and black! Plus, now that the stripping is done, all I have is the sanding and painting (the easy stuff, in that I can do it without having someone else watch my kids while I'm working on it.)

I've got some more sewing projects I'm working on this week; more curtains (for my boys' room) and new oven mitts for my kitchen. Plus, I have a friend coming over tomorrow for some serious crafting, preparing for a big craft night we'll be hosting at my house soon. With all that and life going on, I'm hoping to get my buffet finished by the end of next week. Then I can order my couch!

Sunday, May 9, 2010

A good idea

I thought I would share this idea with everyone because I think it's AWESOME. I came up with it because my boys' favorite bathroom to use is our downstairs powder room. The hand towel would always end up on the floor and it really bugged me. So, I decided that when I got a new hand towel ring, I would get two and put one at toddler level. It's one of the best ideas I've ever had! My boys love it. They insisted on showing Dad as soon as he got home that day. And the best part? The towels stay right where they're supposed to be - on the hand towel holders!


I like it so much that I'm going to do it in my boys' bathroom upstairs too... Once I get around to painting the bathroom.

LinkWithin

Blog Widget by LinkWithin